本文讲解设备开发者如何通过阿里云IoT已认证的Wi-Fi模组上开发产品功能,并将设备连接到生活物联网平台。
前提条件
已完成开发环境的安装,请参见SDK概述与开发环境设置。
获取SDK代码及编译
烧写固件到模组
在编译得到固件后,即可以将固件烧写到模组中执行。不同的模组烧写过程不一样,请联系模组厂商获取烧写工具以及烧写说明。
在生活物联网平台定义产品
- 调试设备。
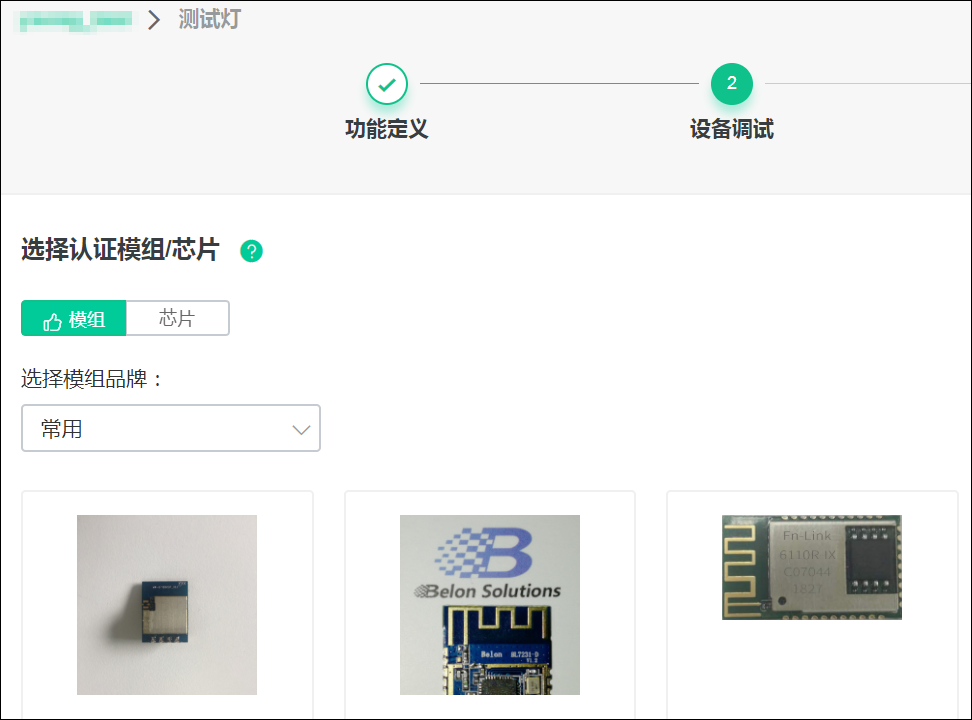
- 选择已认证的模组。
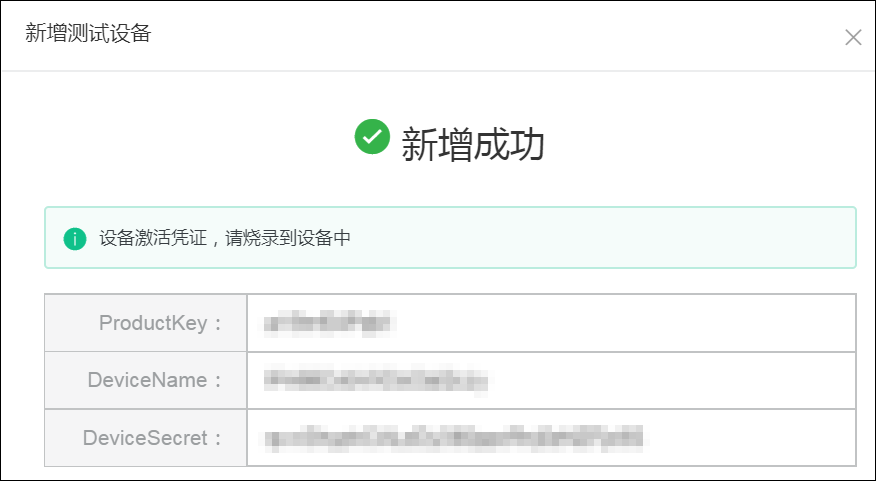
- 新增测试设备,并获取设备激活凭证。
详细操作参见新增测试设备。
- 选择已认证的模组。


产品功能开发
- 配置设备身份信息。
在linkkit_example_solo.c的代码中设置了设备的身份信息,设备开发者需要将测试设备的信息对其进行替换。
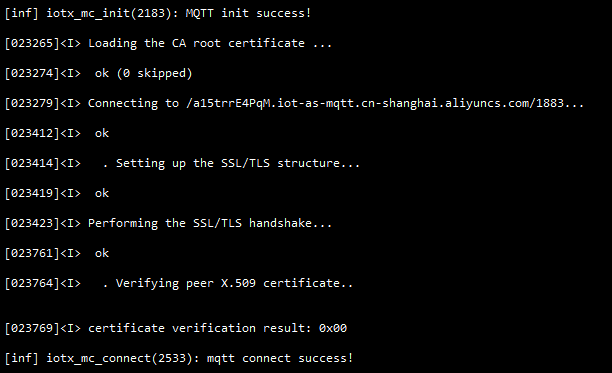
// for demo only
#define PRODUCT_KEY     "a15****PqM"
#define PRODUCT_SECRET  "4uZsr*****zhjPM"
#define DEVICE_NAME     "IFn6******OaI2cJy"
#define DEVICE_SECRET   "qwvShyphC*******NZFjc8S"
设备开发者将设备身份信息设置到程序之后,可以将代码进行编译并遵循模组商提供的烧写工具将固件写入模组,确保设备可以连接到阿里云物联网平台。如果模组提供串口打印输出,当模组连接到阿里云物联网平台后将会输出类似如下的提示信息。
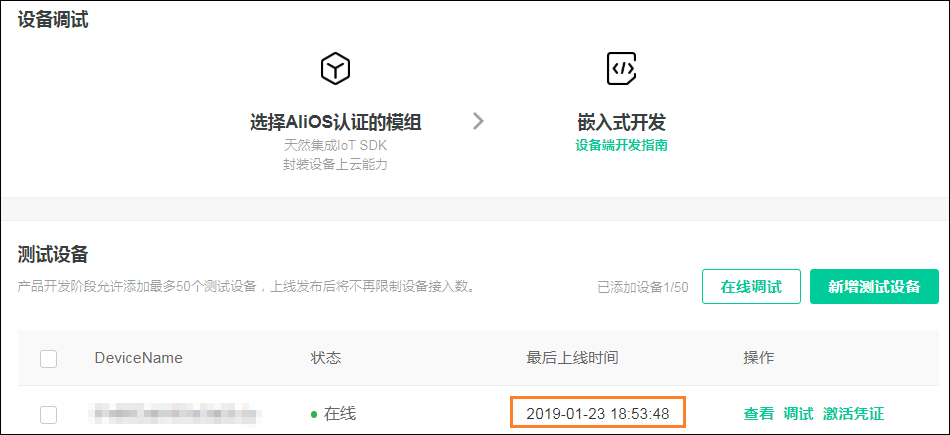
如果模组可以正常连接阿里云物联网平台,在生活物联网平台的商家后台可以看到该设备已激活,以及设备连接到物联网平台的时间信息。


Wi-Fi配网
配网支持如下所示。
- 一键配网(Smartconfig):App直接给设备配网
- 手机热点配网(phone-config):App直接给设备配网
- 路由器热点配网(router-config):输出到路由器厂商/运营商
- 零配(zero-config):已配网设备为待配网设备配网
- 设备热点配网(dev-ap):设备开热点,手机连接设备热点完成为设备配网
- 蓝牙配网(ble-config):借助BT/BLE为设备配网

start_netmgr()的修改。
static void start_netmgr(void *p)
{

    /*
     * register event callback to detect event of AWSS
     */
    iotx_event_regist_cb(linkkit_event_monitor);
    netmgr_start(true);
    aos_task_exit(0);
}
详细的开发过程如下步骤所示。
云端解绑与恢复出厂默认设置通知
设备被解绑后,云端会下发一个解绑事件通知:{"identifier":"awss.BindNotify","value":{"Operation":"Unbind"}} 设备收到此消息可以做重置配网、清空本地数据等处理。
如果通过App将设备恢复出厂默认设置,云端会下发一个Reset事件通知:{"identifier":"awss.BindNotify","value":{"Operation":"Reset"}} 设备收到此消息可以做重置配网、清空本地数据等处理。设备开发者可以结合具体产品类型,决定收到解绑和恢复出厂默认设置通知后做哪些清空操作。
可以参考示例代码example/smart_outlet/smart_outlet_main.c中notify_msg_handle函数,做如下改动。
static int notify_msg_handle(const char *request, const int request_len)
{
    ....

    if (!strcmp(item->valuestring, "awss.BindNotify")) {
        cJSON *value = cJSON_GetObjectItem(request_root, "value");
        if (item == NULL || !cJSON_IsObject(value)) {
            cJSON_Delete(request_root);
            return -1;
        }
        cJSON *op = cJSON_GetObjectItem(value, "Operation");
        if (op != NULL && cJSON_IsString(op)) {
            if (!strcmp(op->valuestring, "Bind")) {
                EXAMPLE_TRACE("Device Bind");
                vendor_device_bind();
            }
            if (!strcmp(op->valuestring, "Unbind")) {
                EXAMPLE_TRACE("Device unBind");
                vendor_device_unbind();
            }
            if (!strcmp(op->valuestring, "Reset")) {
                EXAMPLE_TRACE("Device Reset");
                vendor_device_reset();
            }
        }
    }

    ....
}
设备重置
对于生活物联网平台来说,建议产品设计一个reset按键用于清除设备上的配置,将设备恢复到出厂状态,同时调用awss_report_reset()函数告知云端清除设备与用户的绑定关系。
因此,设备商需要在处理reset按键的逻辑中增加对awss_report_reset()的调用。
/*
 * 应用程序调用该API后,Linkkit首先往Flash里存储恢复出厂设置的标志,并向云端上报reset操作,
 * 在规定的时间内(3秒)如果没有收到云端的回复,设备会重新上传reset,直至收到云端的回复位置;
 * 有些产品希望发生reset时设备可以重新启动,如果重新启动之前reset没有上报成功,下一次连接云后,
 * 设备会首先检查Flash中恢复出厂标志是否设置,如果设置了则首先向云端上报reset,直至成功;
 */
int awss_report_reset();
开发OTA
若使能了OTA功能,请参见OTA编程。